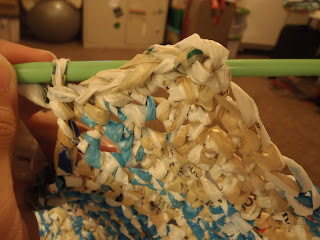
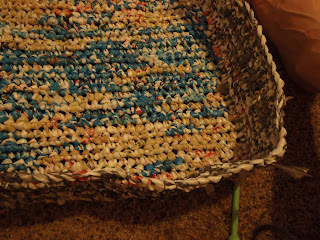
The plastic yarn I make from plastic grocery bags really reflects the stores I frequent. In central Ohio, brown sacks come from Kroger, blue from Giant Eagle, gray from Walmart, yellow from Dollar General, and white from Walmart, Meijer, Joann's, Michaels, Hobby Lobby, Big Lots and many others.
I’ve mixed the colors in several different ways. Sometimes, I’ll cut up the different bags (see the previous blog entry on how to do this) and throw all the different colors together in the same bag and connect them together randomly. I just stick my hand in the bag and whatever color comes out next is the next color in the ball of plarn.
Now, the OCD way of doing things is to separate the bags into colors, cut them each up keeping the colors separated. This way, you can string together balls of plarn that are the same color.
It really doesn’t matter which way you do it. Choose what makes you happy.
Now on to the patterns for the totes.
I basically use two different types of patterns and whatever size crochet hook feels the best. You can’t use a really small hook because you won’t be able to grab the plarn to make individual stitches. A really big hook means you’ll have large holes that “stuff” might fall through once you start using your tote. Just experiment until you find something that feels right.
Pattern One
Crochet the bottom of the bag. Do this by chaining however many stitches that will make a bag the length you’d like it to be. Then start single crocheting every row until the rectangle you get is the size of the bottom of the bag.
 |
| This is the bottom rectangle. |
 |
| This is what the bag will look like after you continue crocheting in the round for awhile. |
 |
| One round of reverse single crochet puts a nice edge on the top of the bag. |
Again, crochet a chain that’s as long as you want the bag to be, Then start single crocheting each row until you get a large rectangle that is the size of one side of your tote.
 |
| It looks a little wonky, but this is the size square I'll use as the basic size of this bag. |
Again turn your work clockwise 90 degrees and pick up
stitches in each chain along the bottom edge. When you get to the end, again
turn your work clockwise 90 degrees and single crochet in each row until you
reach the top. Don’t put extra stitches in the corners as you turn the tote to
pick up stitches. You want this “U” shape to start forming the sides and bottom
of the tote.
When you finish the last row of the sides, chain one and
turn. Single crochet down the side until you reach the bottom. Now it’s time to
start crocheting the other main side of the tote. You’ll complete rows of
single crochet and crochet the last stitch in the row together with a stitch in
the side.
 |
| This is what the bag will look like as you crochet up the last side of the bag. |
 |
| Crochet to the last stitch in the row. |
 |
| Single crochet in the last stitch but don't pull the plarn through to make the last stitch. Instead, pick up the stitch in the side. |
 |
| Then pull the plarn through all three loops on the hook. This is kind of like a single crochet decrease. |
 |
| The slip stitch in the stitch on the side above the row you've just completed. |
 |
| After you slip stitch turn your work and continue in single crochet across the row. |
 |
| This is the final tote using Pattern Two. |
It seems to me that a really cool plastic grocery sack tote can be ruined if the handles aren’t strong enough. Believe it or not, the handles will give way before the rest of the bag does. Again, I’ve tried several different types of handles, and these are the ones that work best for me. But if you’ve got a different way of doing it, go for it! These are, after all, totes made from plastic grocery sacks. We’re not talking life or death here! J Use your own creativity!
I chain 11, turn and single crochet in the second chain from the hook and single crochet across. Continue until the handle is as long as you want it. Then I fold the handles in half lengthwise and crochet along the open edge to create a double thickness handle. Leave a long tale when you get to the end and fasten off and use the long tail to whip stitch the handle where you want it. I whip stitch around all four edges. This creates a very firm and secure attachment.
 |
| Place the handles wherever you think they'll be the strongest. |
 |
| These are the handles whip-stitched in place. |
 |
| The bag on the left is crocheted with a double thickness and used Pattern Two. The bag on the right is single thickness and Pattern One. |
 |
| The two bags on the ends are made using Pattern Two and the bag in the middle used Pattern One. |


